Your First Assistant
A step-by-step guide to launching a working virtual assistant from scratch. Complete in about 10 minutes.
This guide takes you from an empty dashboard to a virtual assistant that can greet users and respond to questions, covering every major part of the platform.
Total time: ~10 minutes
Before you start
You need a Virbe Hub account and at least one Dashboard created. If you don't have a Dashboard yet, create one from the Hub home screen.
Step 1 – Create a Persona (2 min)
The Persona defines who your virtual being is: its name, personality, voice, and appearance.
- Open your Dashboard and navigate to Personas in the left sidebar
- Click + Create persona
- Fill in the basics:
- Name – what users will call your assistant (e.g. "Aria")
- Age, Role, Bio – short identity description (used as context for AI responses)
- Under Avatar, select an avatar type and choose from the gallery (tip: select avatar type based on the touchpoint you're targeting, choose between web avatars and Metahuman avatars for the kiosk app)
- Under Voices, select a language and pick a voice
- Click Save
Step 2 – Connect an AI model (3 min)
The conversational engine is the AI backend that generates responses. For this quickstart, you'll connect OpenAI.
- Go to Configurations → AI models
- Click + Add AI model and select provider, e.g. OpenAI
- Enter your OpenAI API key and base URL
- Adjust model's configuration – select model and additional settings as available (depends on the provide selected)
- Click Save and set it as Default
While you're here, also check that Speech-to-Text and Text-to-Speech engines are configured under their respective tabs. On Virbe-hosted dashboards these may already be set up – if the lists aren't empty, you're good to proceed.
Step 3 – Open the Conversation Editor (1 min)
Navigate to Conversation Editor in the left sidebar.
You'll see the Pipeline panel on the left with four sections: Handlers, Conversational Flows, Automations, and at the bottom, Variables and Signals.
The default pipeline already has a Core flow and a Main flow set up as starting points. You'll build on these.
Step 4 – Add a greeting (2 min)
Let's make the assistant greet users when a conversation starts.
- Open the Core flow from the Conversational Flows section in the sidebar
- Find the If/Else Router connected to the Start node's On Signal output (Core routes signals here by default)
- Add a new condition: Signal : conversation-start
- On that condition's branch, add a Go to Flow node and select
Greetfrom the dropdown- If there's no
Greetflow yet, click + Add flow in the Conversational Flows section first, name itGreet, then come back
- If there's no
- Leave the Else branch routing to Main flow or other flow that should handle conversational logic after greeting
- Open the
Greetflow from the sidebar - Add a Text node and write your greeting:
Hi there! I'm Aria. How can I help you today?
This routes the greeting entirely from Core, without touching the On conversation-start handler – keeping all signal-based routing visible in one place. You could instead add an Activate Flow node inside that handler, but centralizing routing in Core is easier to keep track of as your pipeline grows.
Step 5 – Test it (1 min)
Click Test conversation in the top bar. A chat panel opens on the right.
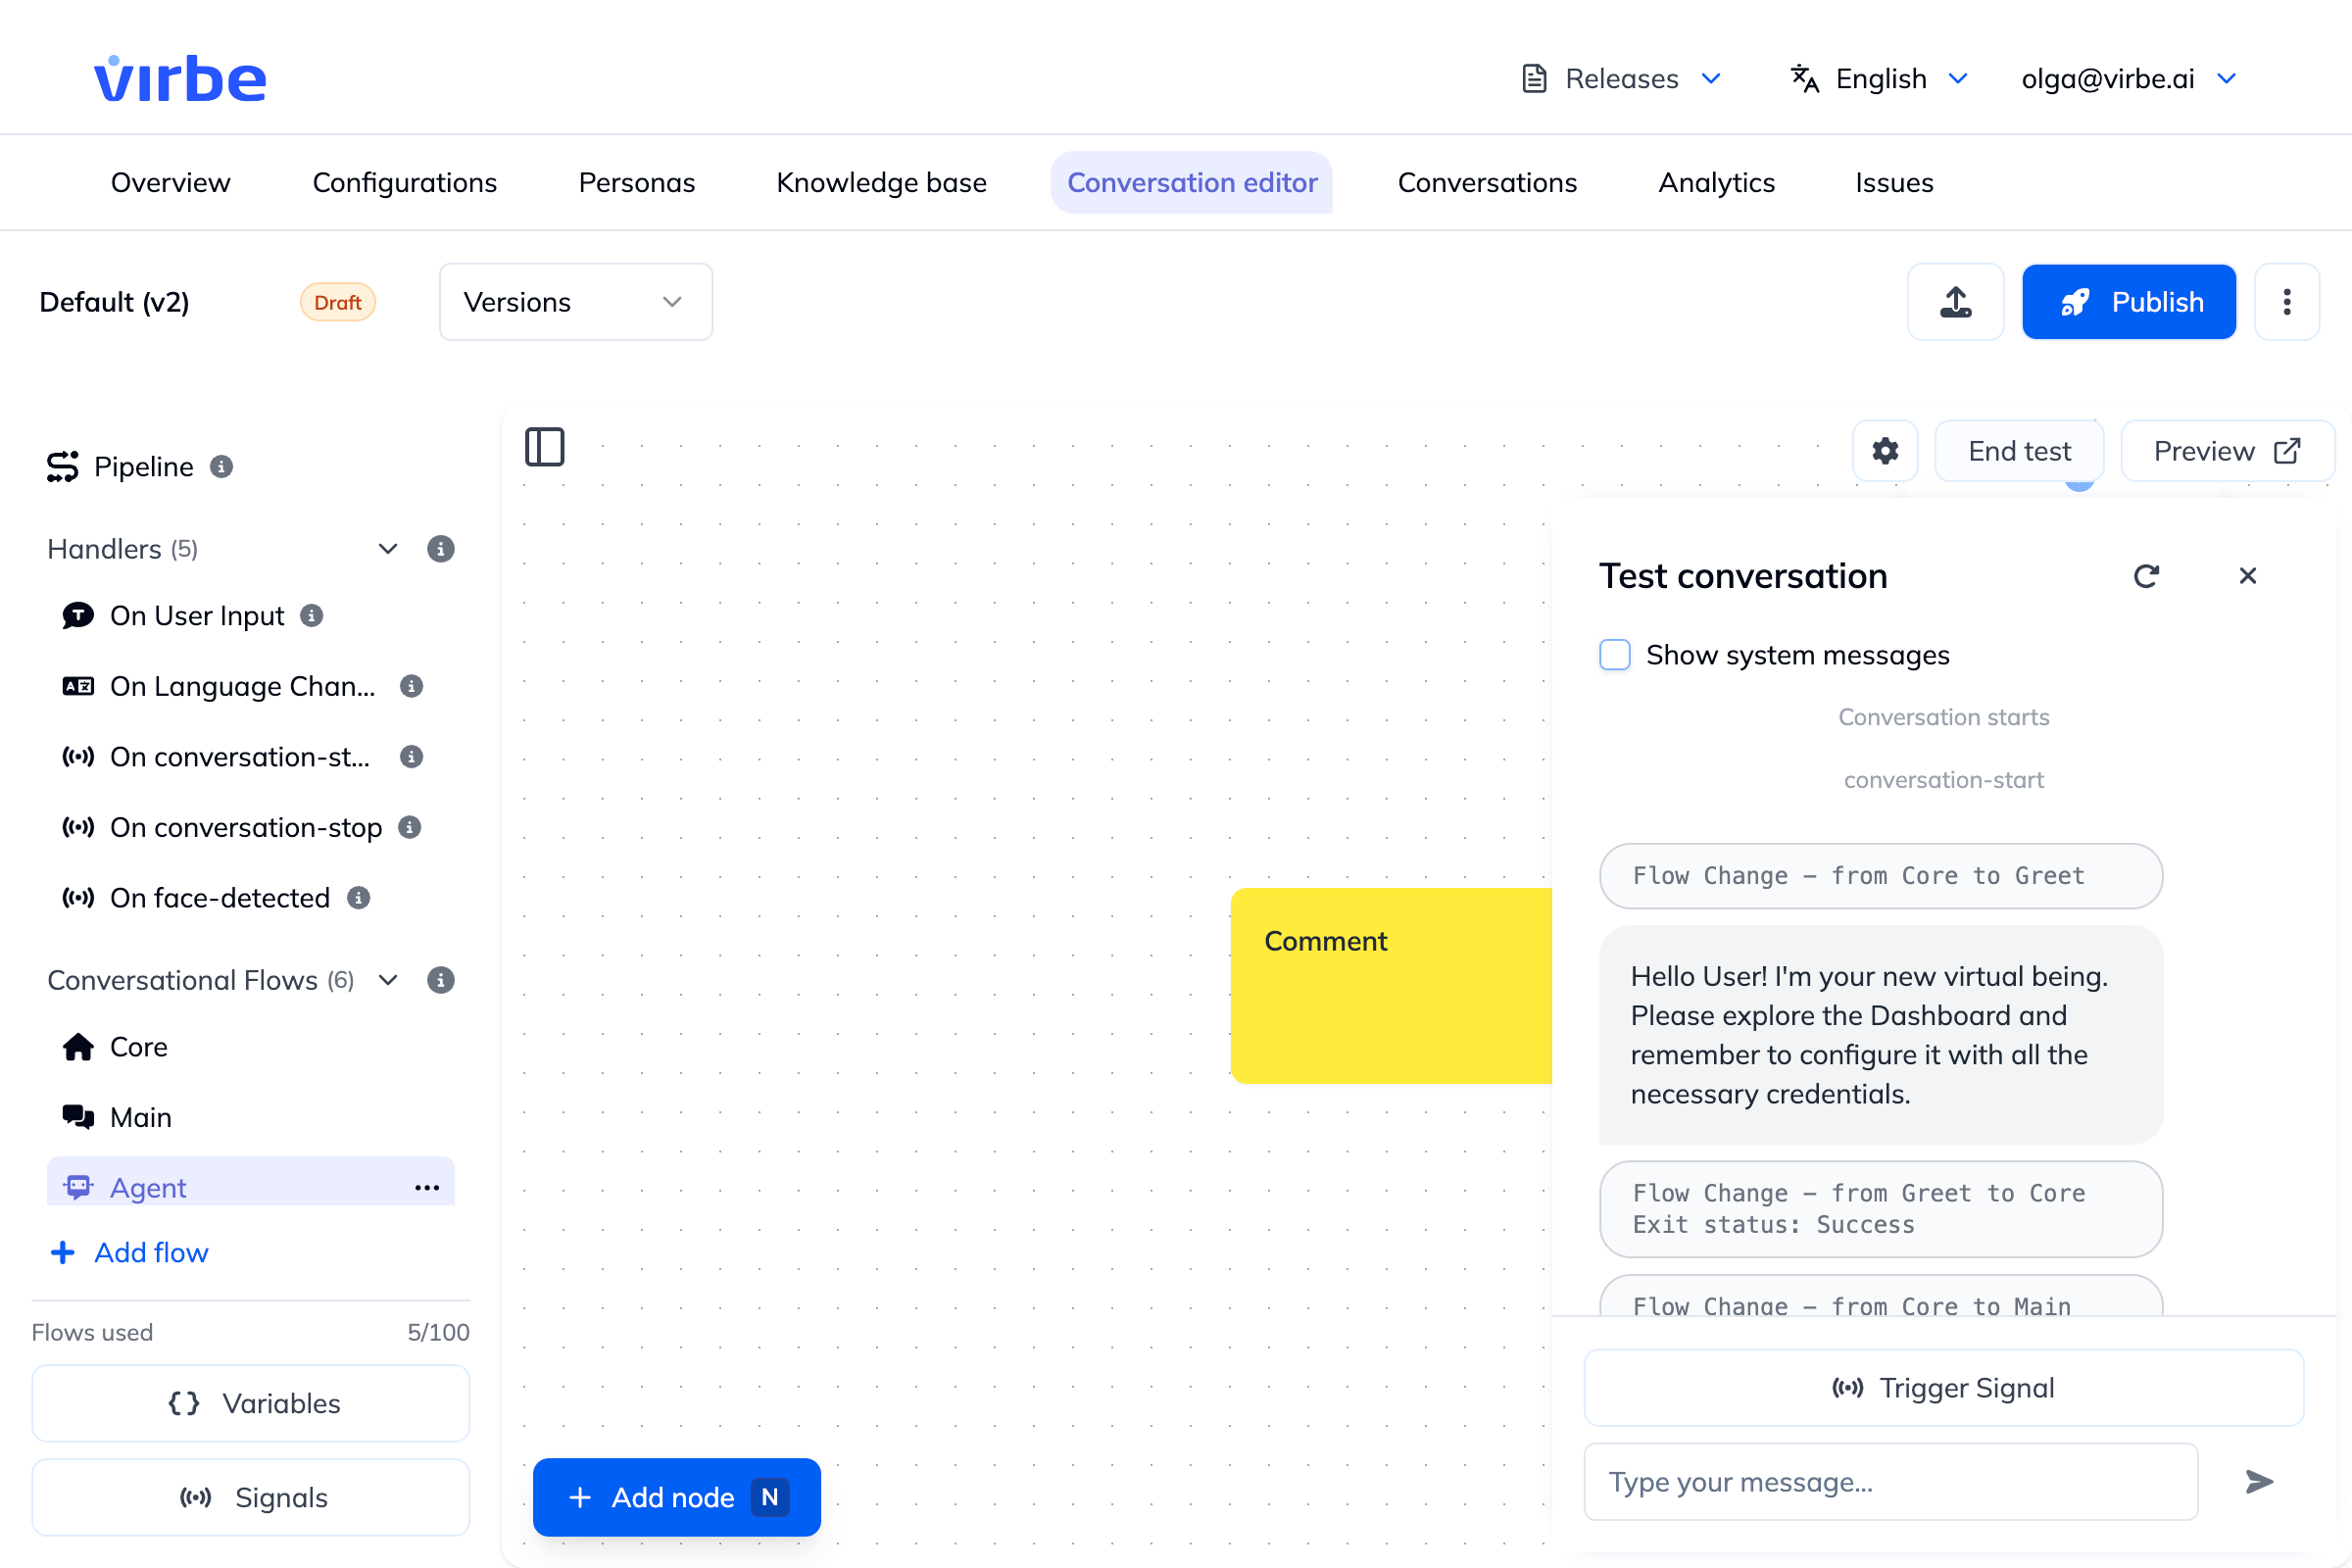
Start a conversation – your greeting should appear immediately. Type a message and see how the assistant responds using the connected conversational engine.
If the greeting doesn't appear, check that Core's If/Else Router condition matches the signal name exactly (conversation-start), and that its branch's Go to Flow node points to Greet.
Step 6 – Create a Profile and publish (2 min)
A Profile is the configuration for a specific deployment – in this case, a web widget.
- Go to Overview in the left sidebar, find the Profiles section, then click + Create profile
- Name your profile (e.g. "Website") and select Web Widget as the touchpoint
- Assign the Persona you created in Step 1
- Save the profile
Now go back to the Conversation Editor, click Publish in the top bar, and confirm. Your pipeline is now live on this profile.
Back in the Profile settings, open the Deployment tab to authorize the domain where you want to embed the widget and get the embed code for your website.
What's next
You have a working virtual assistant. From here: